> For the complete documentation index, see [llms.txt](https://docs.xviz.com/llms.txt). Markdown versions of documentation pages are available by appending `.md` to page URLs; this page is available as [Markdown](https://docs.xviz.com/project-management/other-features/splitter-position.md).

# Splitter Position

In the xViz Gantt Chart, the separator dividing the data grid and timeline, or data bars is called the “Splitter”.

<figure><img src="/files/cuC5ruHp6WqeQLYDCcef" alt=""><figcaption><p><em>GIF 1: Splitter in xViz Gantt Chart</em></p></figcaption></figure>

### Steps to position the Splitter

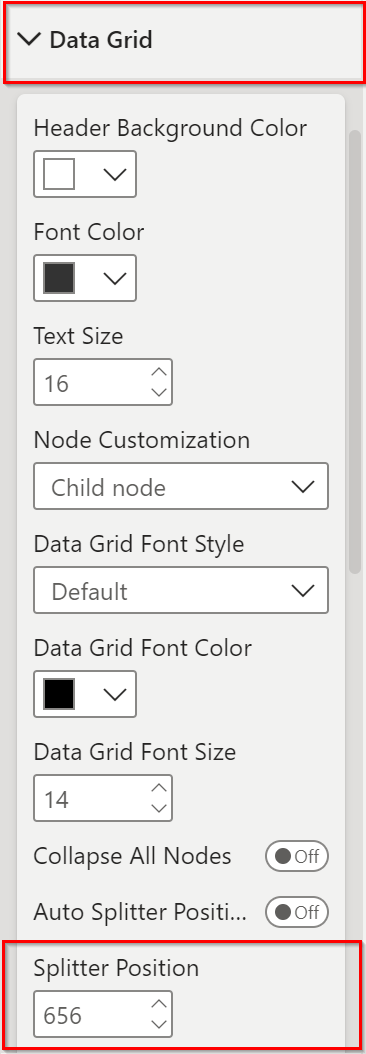
1. Go to the Format Pane and navigate to the “Data Grid” section:<br>

   <figure><img src="/files/iWkt9LQI7gu9ggmYZrrQ" alt="" width="183"><figcaption><p><em>Image 1: Data Grid Section in the Format Pane</em></p></figcaption></figure>

2. The Gantt Chart offers two options to adjust the Data Grid width:

* **Auto Splitter:** Turn on the "Auto Splitter Position" option.

<figure><img src="/files/orSX6cP2uykcipnGQ0m4" alt="" width="182"><figcaption><p><em>Image 2: Turn on Auto Splitter Position</em></p></figcaption></figure>

The final result, the Auto-Splitter dynamically adjusts the column widths, ensuring that all columns are fully visible in the Data Grid, as shown in the image below:

<figure><img src="/files/FuJgdxGCHVmPyqL7izP3" alt=""><figcaption><p><em>Image 3: Auto Splitter with xViz Gantt chart</em></p></figcaption></figure>

* **Splitter Position: F**irst, turn off the "Auto splitter position" toggle. Then, locate to the "Splitter position" option, which allows you to manually adjust the width of the Data Grid to your preference.

<img src="/files/3LBUPsTZ0RYunPiRajEn" alt="Image 4: Adjust Splitter Position" width="183">

The final result, the chart shows all columns in the Data Grid, is displayed in the image below:

![Image 5: Splitter Position with xViz Gantt Chart](/files/CyhkPhdHMIDgK0rIu1sy)